
A More Efficient Way to Organize Notes

My brain loves to solve problems, and a few years ago, I had a problem that was driving me absolutely crazy. Every time I needed to look back on notes from client meetings, I was having to search through multiple files to find what I needed. This is, of course, because I was creating a new document to take new notes in for every meeting, like many people do.
One day, my frustration grew large enough that I started brainstorming solutions, and it didn’t take me long to realize that there was a much better way.
If I was already taking client notes digitally, why on earth was I creating new documents for each meeting when I could just put all of a client’s notes in one big document?
I immediately implemented the idea, but quickly realized that I needed to dial it in a bit more. It was getting annoying to have to scroll and scroll to find the most recent notes at the bottom of the document, so I came up with a solution for that.
With a couple of other additions, I got it right where I want it and now use this format for all of the meetings I host regularly. It saves me sooooo much time when I need to look back on the notes since everything is in one document.
I also use the keyboard shortcut “Command + F” on my Mac (or CTRL + F on a Windows computer) to pop up a search bar in the document and voila, I can find exactly what I need in a few seconds!
So without further ado, I’ll walk you through my framework.
Please note: I manage my notes in Google Docs, and my references will be centered around Docs. You can find similar features in Microsoft Word as well.
1. Pageless Document (i.e., no page breaks):
In Google Docs, enabling "Pageless" format transforms the document from a series of pages to one continuous, scrollable canvas. To do this, go to "File" > "Page setup" and select "Pageless."
This is ideal for meeting notes as it eliminates visual breaks and keeps information flowing seamlessly. It makes it easy to add and review notes without worrying about pages cutting off sections mid-sentence or requiring adjustments as notes are added.
2. “Default Styles” feature:
Google Docs allows customization of text styles like "Title," "Subtitle," "Heading 1," "Heading 2," etc. These can be found in the style dropdown menu on the toolbar.

You can then adjust the font, size, color, and other formatting options. This helps maintain consistency and organization throughout your document. Each section of your notes can be easily marked with different heading levels, allowing for quick navigation using the document outline.
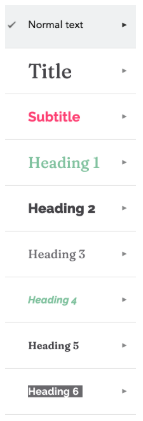
Here’s an example of how we’ve set up our text styles in Docs:
If that’s all foreign to you, I’ve got you! I shot a four-video series that walks you through how to set it up. You can find the videos on Instagram using these links: Adding your brand colors, adding your fonts, setting up your default styles, and features you can utilize with default styles.
3. Newest notes at the top, oldest notes at the bottom:
Organizing notes in reverse chronological order ensures that the most recent information is readily accessible. In practice, this involves adding a new section at the beginning of the document each time you have a meeting, rather than appending to the end.
You can create visual breaks, if necessary, by inserting a line using “Insert” > “Horizontal Line.” When you want to find older notes, you'll scroll to the document outline, as opposed to searching through multiple files.
4. A “template” section:
Creating a template section at the top of your Google Doc involves having a designated area that outlines the standard format for your meeting notes. This template could include sections for date, attendees, agenda items, action items, and key takeaways.
Keep this template section easily copyable and accessible. Before each meeting, simply copy the template and paste it into the notes document directly below the template and just above the most recent notes. With the start of your outline for your next meeting created, you’ll save time and also ensure you capture the same information consistently across meetings.
That’s it! If that resonates with you, I highly recommend implementing this framework for your meetings. It has been an absolute game-changer for us at FTLOS and has actually shaped how we organize a lot of other information, too.
For example, we also organize all of the content that’s written for our email newsletter, this blog, and our social media in a similar format. With the historical record all in one place, it makes it SUPER easy to search the entire document for certain words or phrases to see if we’ve shared something before or to repurpose things we’ve written about elsewhere.
If you need help setting up something similar for your own note-taking or content management, that’s the perfect thing to talk about in a Drop-In Coaching session! And if the setup doesn’t take us long, it could also be part of a larger coaching session focused on efficiency/productivity!